
Gradebook reports are only available on premium plans; see Plans & Pricing for details.
No one enjoys pulling a late-night (or all-night) grading session.
If you’ve ever had to wipe a bit drool or a dried coffee ring from a student’s exam, consider using Poll Everywhere’s Gradebook reports to help save time.
These reports are a quick grading solution that shows how your students scored on any test or quiz created using Poll Everywhere. Gradebook reports automatically track how each person responded and calculate their score in one complete, comprehensive list.
You create Gradebook reports in three steps: register your students with Poll Everywhere, present your quiz or test, and generate the report. The video below gives an brief overview of these steps. If you’d like a more detailed explanation, I’ve included step-by-step instructions below the video.
New to Poll Everywhere? Here’s how it works
Step 1: Register your students
The first step in quick grading with a Gradebook report is to register your students. This provides the necessary information to identify how each student responded once the report is finished. I’ll show you how to automatically add students to a group as well. It doesn’t involve any extra work for the students, and doing so lets you organize them by grade or class.
How to register students
- Sign in to Poll Everywhere and go to your ‘My Polls’ page
- Click ‘Participants’ in the menu bar at the top of the screen
- Under ‘Groups’ on the left-hand side of the screen, click ‘New Group’
- Name your group and select ‘Done’
- Mouse over your group name and select ‘Invite’
- Copy the link shown and share it with your students
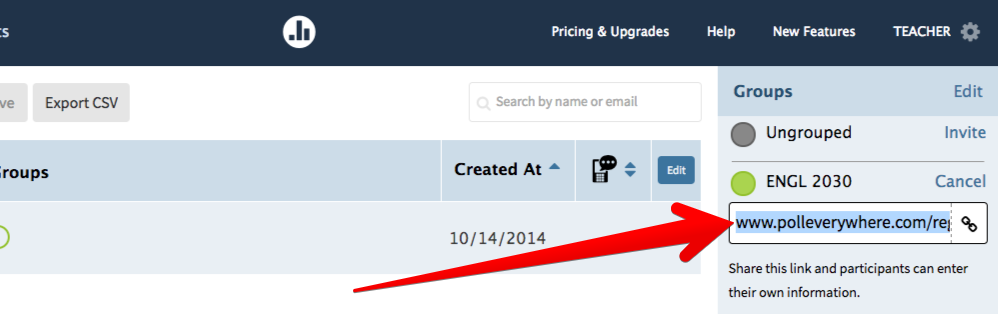 When students open this link they will be prompted to create a participant account with Poll Everywhere. The account is free, and once they sign up their information will be automatically added to the group you specified. You can also edit their information if needed, or move students between different groups.
Get more information on student registration
Step 2: Ask your question
Okay, the hard part is over. I know getting an entire classroom to do anything is asking a lot, but it will be worth it. The next step is to ask the questions you want graded. Any multiple choice or clickable image questions will work, you just need to make sure you designate a correct answer and enable ‘Registered Participants Only’. I’ll explain why below.
How to create a question
- Sign in to Poll Everywhere and go to your ‘My Polls’ page
- Click ‘Create’ at the top of the screen and enter your question
- Enter some responses; click the check mark next to a response to set it as correct
- Click ‘Create’ to create your question
- Select ‘Response Settings’ then ‘Registered Participants Only’
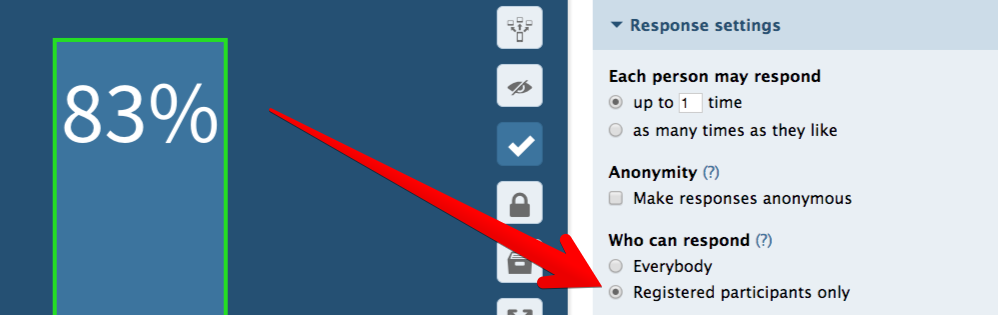
If you followed these instructions, then you now have a multiple choice question with a correct answer. This question can be presented straight from the web, or embedded into any presentation. And because we enabled ‘Registered Participants Only’, Poll Everywhere will automatically track how each student responded.
You can also designate correct answers on ‘Clickable Image’ questions by clicking a dragging a box around an area of the image. Any clicks within that area will count as correct, while clicks outside the designed area will be incorrect.
Step 3: Create the report
This is where all that registering and grouping back in step one pays off. Once students have responded to your question(s), you can create a report that shows exactly how each person scored. Poll Everywhere supports six different reporting types, but for quick grading we’re going to use Gradebook.
How to generate a Gradebook report
- Sign in to Poll Everywhere and go to your ‘My Polls’ page
- Click ‘Reports’ in the menu bar at the top of the screen
- Click ‘Create report’
- Select ‘Gradebook’
- Select the appropriate question(s) and click ‘Finish’
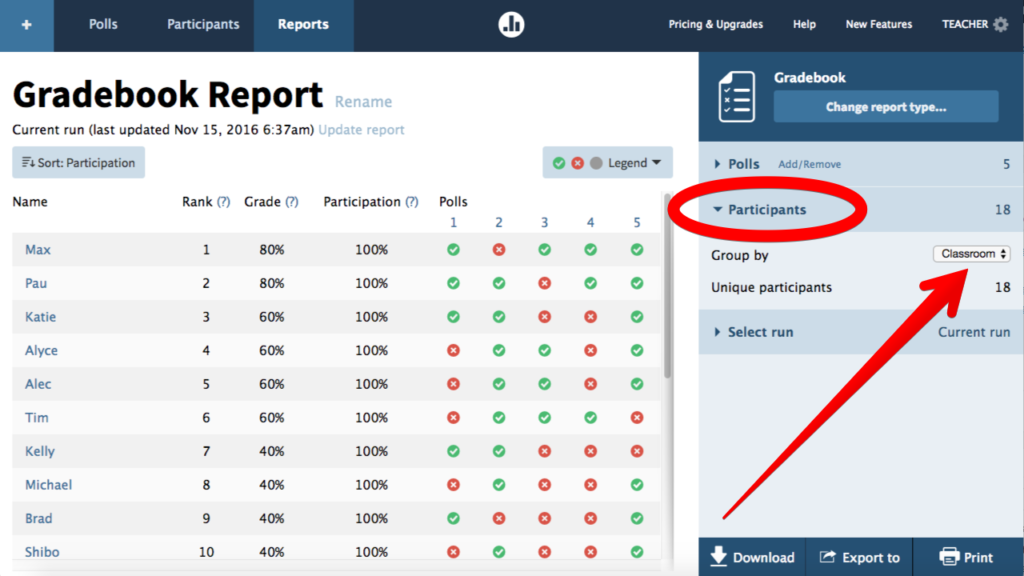
Your completed report will appear after a moment. To help organize all the responses, click ‘Participants’ on the left-hand side and use the drop-down menu next to ‘Group by’ to apply your different groups. Doing so will only display the names of students who are part of that group, including those who did not respond.
Once you’re satisfied, you can download, print, or export this data to Blackboard of Canvas.
Live audience polling has many benefits in the classroom besides quick grading, such as engaging students through live, interactive questions. And because responses are submitted online, rather than spoken aloud, everyone can feel comfortable contributing without public scrutiny.
Check related posts for more ideas on how to use Poll Everywhere as your classroom response system.
Affordable, clicker-free classroom response system
Conduct formative assessments and increase student engagement with Poll Everywhere.